POST 4: With all the embroidery complete and every panel cut to its final dimensions, it was time to assemble the canopy. This was my first canopy project, and while I’ve spent decades constructing garments and vestments, this piece challenged me in ways I didn’t anticipate. The deadline was firm—VaHi Mardi Gras parade was approaching—and getting the canopy finished took priority over achieving perfection.
I’m sharing this part of the project not so much as a how-to guide, but as a case study in problem-solving under constraints. There are things I would do differently next time, and I’ll address those throughout. If you’re considering a similar project, I hope this reflection helps you think through construction approaches before you begin.
The Construction Approach
Let me walk through how this canopy actually came together, because the assembly sequence matters when understanding where the challenges emerged.
The construction was built in stages:
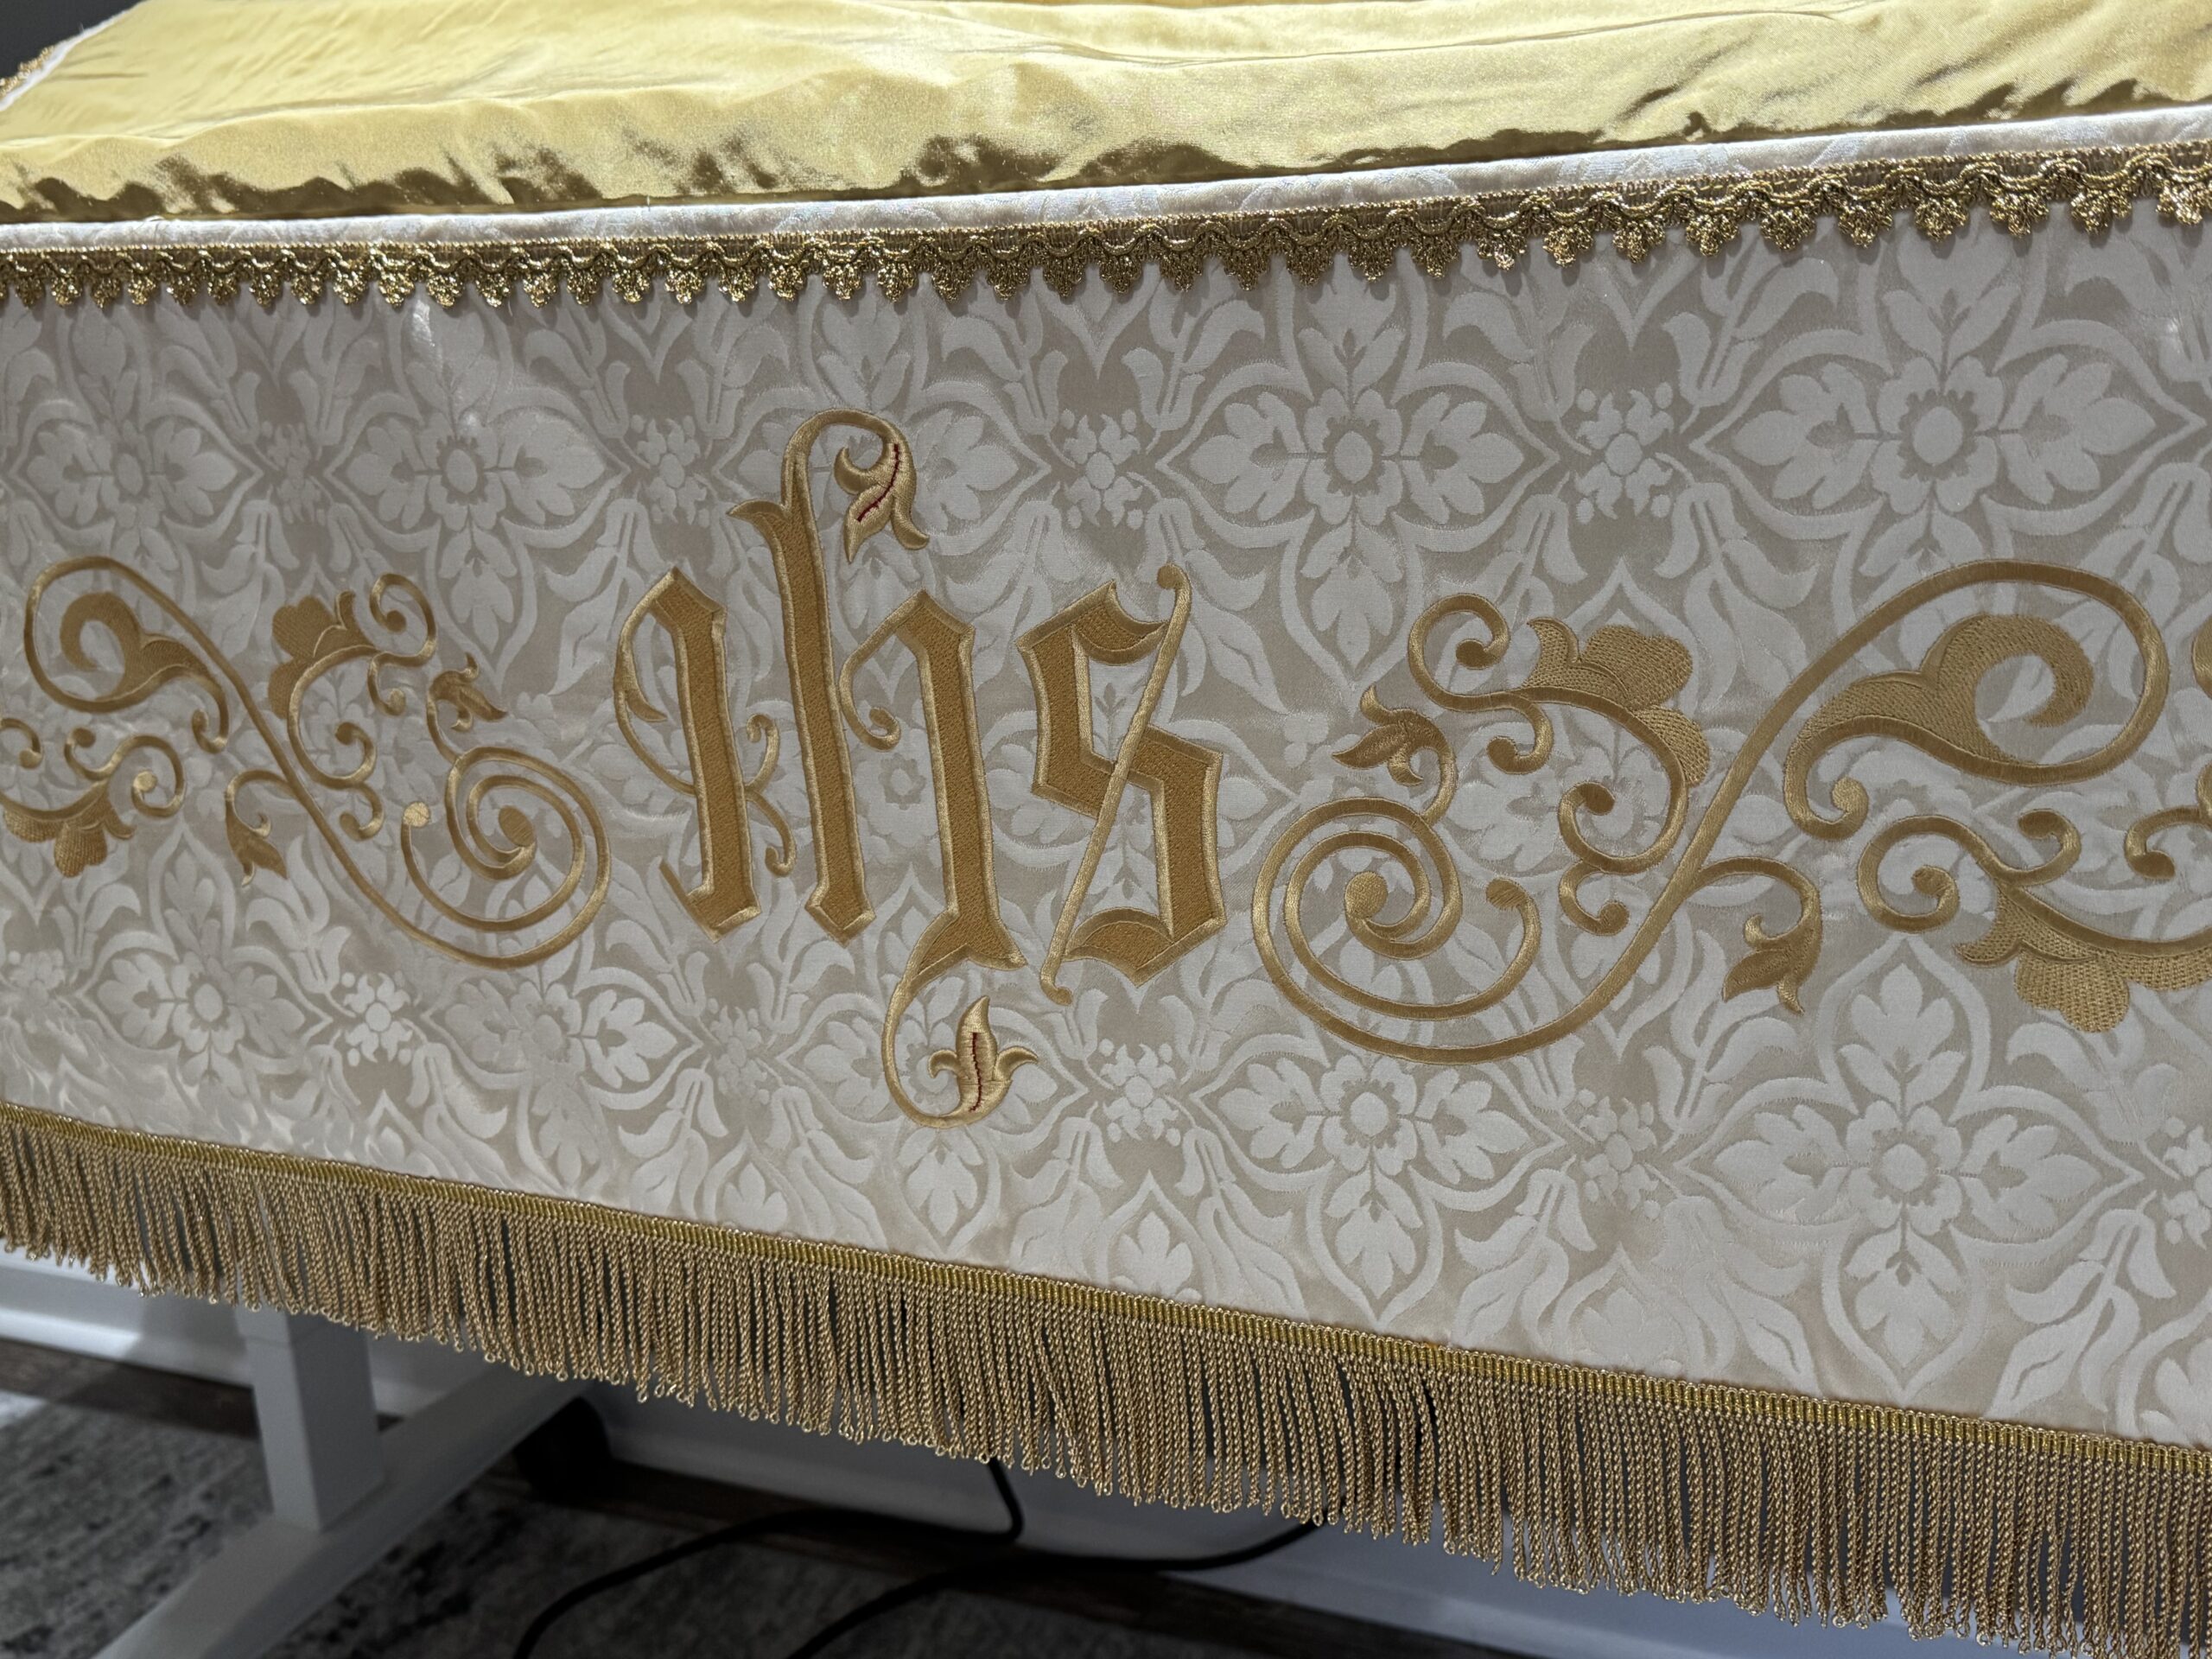
- The top panel: Three layers—silk damask, cotton duck interlining, and silk taffeta lining—were basted together to create the main 52″ x 70″ top section.
- The flaps: Each of the four side flaps was constructed separately using bag-and-turn. I sewed on three edges the damask outer fabric and taffeta lining right sides together with the interlining in between, left the fourth edge open, turned the flap right-side out, and pressed it flat. This gave me four finished flaps, each with one raw edge.
- Attaching the flaps: I attached each flap to the top panel by sewing through all the layers—the flap’s raw edge of three layers joined to the edge of the three-layer top panel.
- The final step: With the flaps attached, I needed to cover all those raw edges on the underside of the canopy. This meant folding the lining fabric over the seam allowances and slip-stitching it down by hand to create a clean finished edge.
This last part—the hand slip-stitching of the lining—is where the real problems surfaced.
Where the Method Fell Short
By the time I reached the slip-stitching stage, I was working with significant bulk: the seam allowances from the top panel’s three layers, plus the raw edge of each flap, all converging at every corner. I trimmed and graded seems, but it was just too much. And I needed to fold the lining fabric smoothly over all of that, create crisp 90-degree corners, and stitch it invisibly in place by hand.
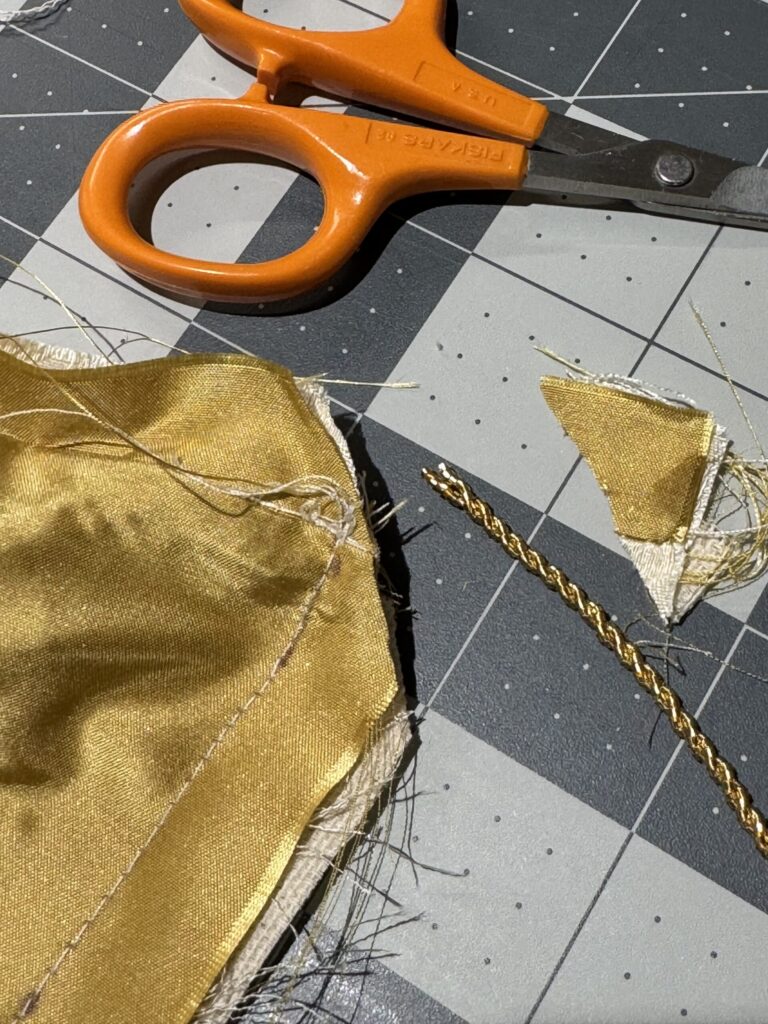
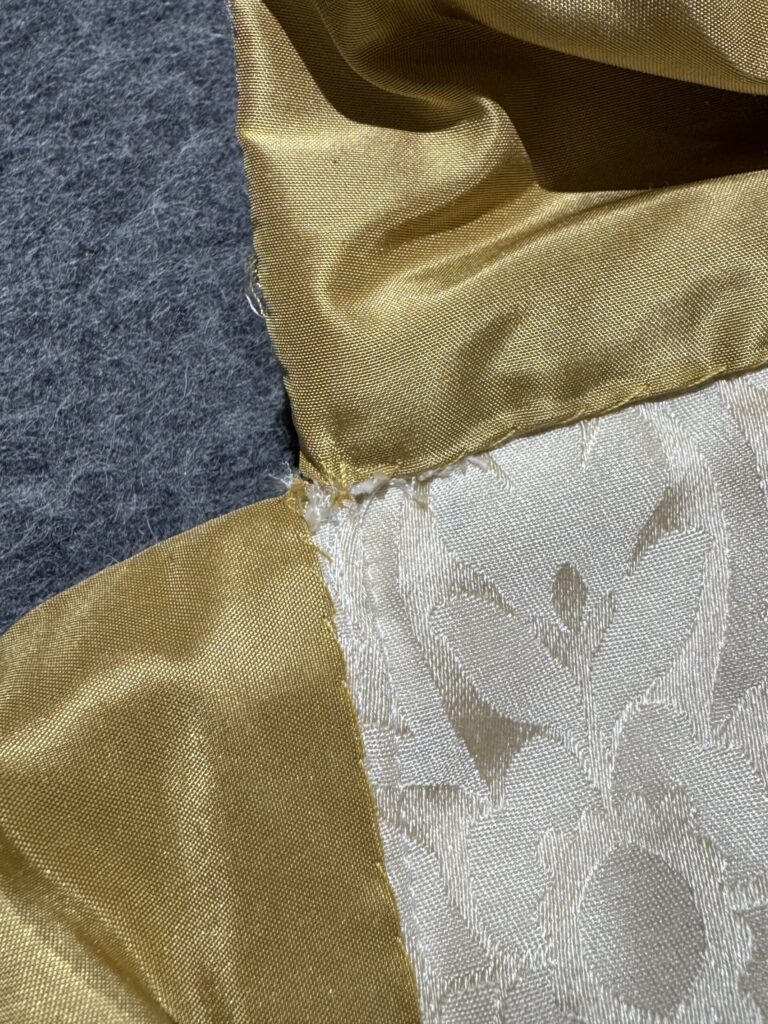
The bulk made it nearly impossible to achieve clean corners. There wasn’t much room to manipulate the lining fabric around all those layers, and trying to coax it into proper position with slip-stitching—essentially using the thread tension to “pull” the lining into shape—meant the corners ended up less than perfect rather than sharp. The inside corners in particular look messy up close.
What Worked: The Pole Attachment
Before discussing what I’d change, I want to highlight what worked exceptionally well: the pole attachment system.
Traditional canopies often use fabric ties sewn into the corners—long ribbons or strips of fabric that are knotted or tied around the carrying poles. From examining historical examples and other canopies in use, I noticed this was consistently the weakest point. Fabric stretches, the ties would tear into the canopy and over time the attachment becomes unreliable and even unusable.
I decided to take a different approach. Instead of ties, I used narrow webbing sewn directly into the corner seams during construction. The webbing—which is far stronger than fabric ties—was incorporated into the seam allowance, creating a permanent loop at each corner. To attach the canopy to the poles, we simply clip the pole hardware through the webbing loops.
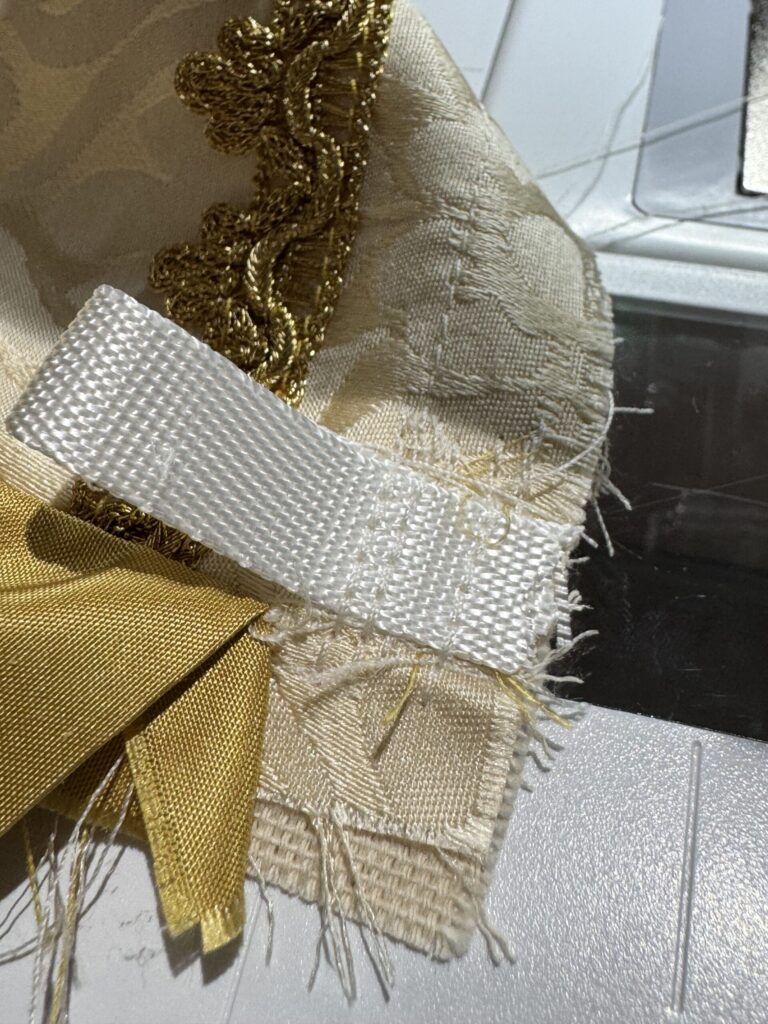
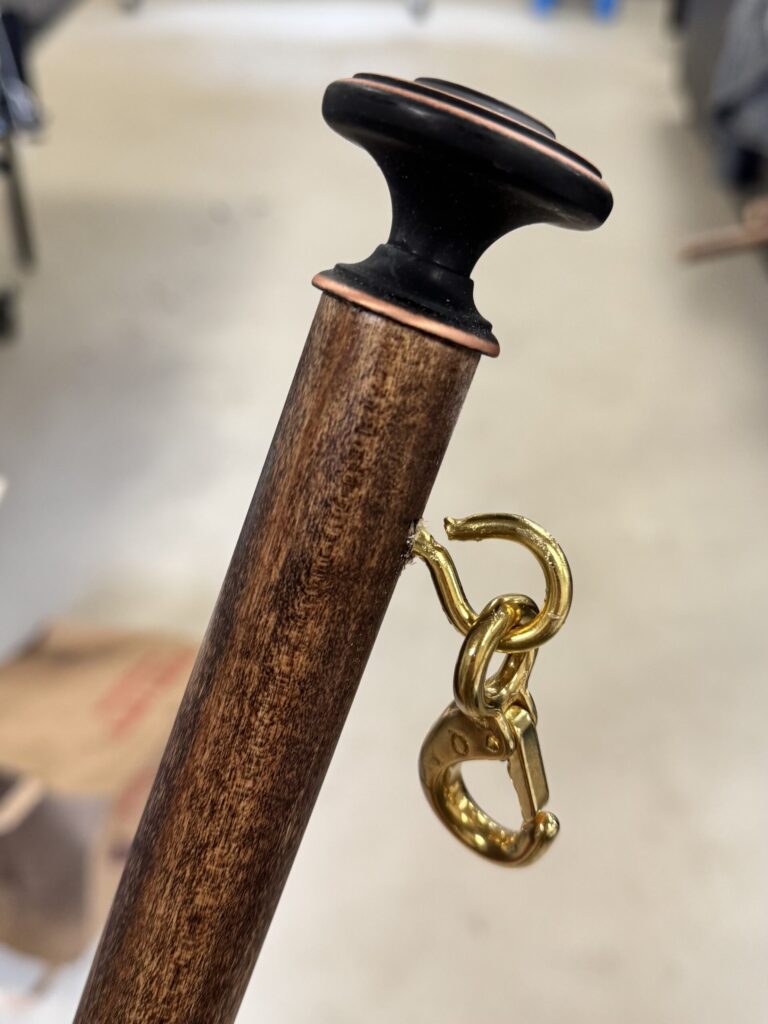
This system has several advantages:
- Strength: Webbing is designed for load-bearing and doesn’t stretch or weaken like fabric
- Speed: Attaching and removing the canopy from the poles takes seconds with clips
- Reliability: No knots to come undone, no ties to retie
- Clean appearance: The webbing sits flat against the seam when not in use
This is one element I would absolutely keep for future canopies. It solved a real problem elegantly, and it’s the kind of modern adaptation that improves function without compromising the traditional appearance of the finished piece.
What I Would Do Differently
If I were to make another canopy (likely) I would change two fundamental aspects of my construction approach.
The Interlining Treatment
One critical mistake was how I handled the cotton duck interlining. I treated it like an underlining and caught it in all the seams, which added significant bulk at every seam allowance.
In couture construction, interlining should be:
- Trimmed to sit inside the seam line, not caught in the seam allowance
- Basted or fell-stitched to the outer fabric within the body of the panel
The standard approach for structured pieces is to cut the interlining slightly smaller than the pattern pieces, position it within the seam allowances, and then fell-stitch it to the outer fabric. When you sew the actual construction seams, the interlining stops short of the seam line—it provides body and structure to the panel itself without adding bulk where the panels join together.
This is a basic principle of tailoring and structured garment construction, and it applies just as much to liturgical textiles that need architectural precision. By catching my interlining in every seam, I was essentially guaranteeing that my corners would be bulky. The cotton duck, the damask seam allowance, the flap seam allowance, and the lining all converged at the same spot. No amount of grading and clipping could fix a construction sequence that stacked those layers in the same location.
I’m working through a book on couture construction techniques right now, and this project has shown me exactly why these methods exist. They’re not just about achieving a “high-end” look—they’re about matching the construction approach to the structural and visual demands of the piece. The methods I used were efficient and familiar, but they weren’t right for what this piece needed to be.
The Lining Attachment Method
Instead of using bag-and-turn for the flaps, I would use the couture technique of pressing seams under and stitching the “lining” by hand. This is a standard method in high-end garment construction and is exactly what’s recommended in couture sewing technique books.
The process would work like this:
- Add embellishment/fringe to outer flaps main fabric.
- Attach the interlining to the damask pieces (4 flaps and the top panel).
- Create a main piece and a lining piece. Stitch the four flaps damask to the top lining (this is the “main” piece with the flaps that face outward). Stitch the top damask to the four flaps lining (this is the lining piece with the damask top and flap lining facing downward).
- Press the seam allowances under on the main piece and the lining piece, clipping corners where needed.
- Hand-stitch the lining piece to the main piece at the edges.
- Tack the seams that join the flaps to the main piece together (main piece and lining piece) to keep them from slipping and help maintain the structure of the canopy.
Hand-stitching the two finished edges together means the bulk is controlled and reduced before the lining goes on, not trapped underneath it.
The Completed Canopy
Despite the construction challenges, the canopy was completed on time and served its purpose beautifully – to create visibility for the parish in the Mardi Gras parade. It reflected our reverence for liturgy and tradition, while allowing our diverse parish to participate in the parade and really demonstrate who we are.
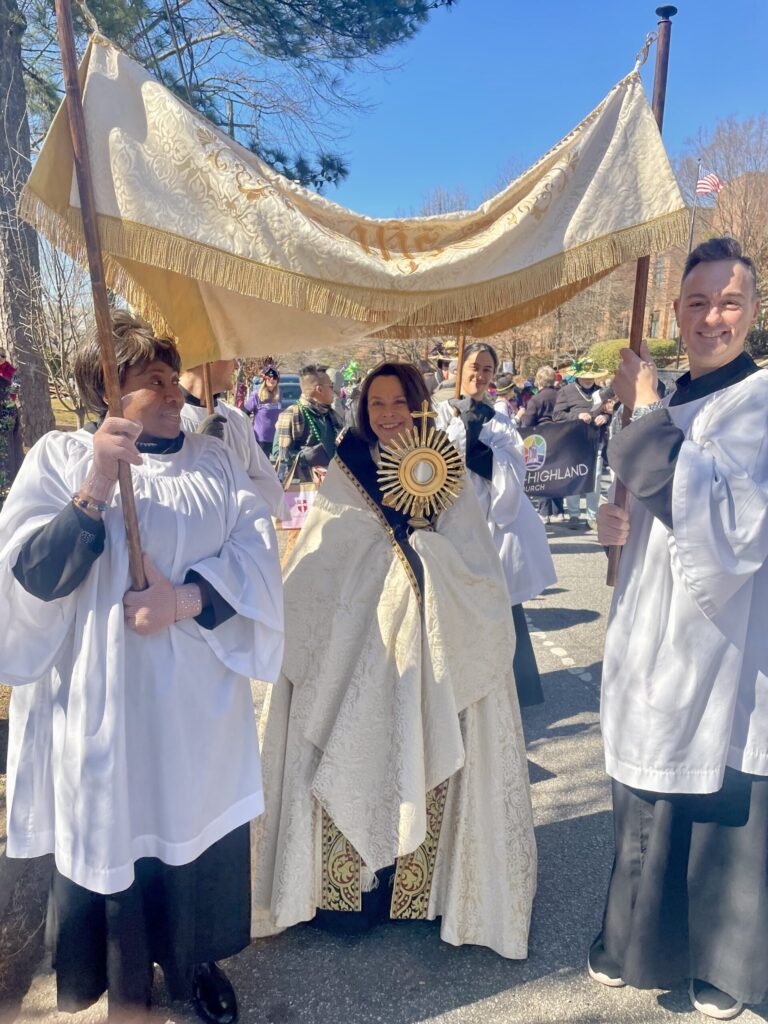

But as with all my work, I measure success not just by whether a piece functions, but by whether it reflects the level of craftsmanship I’m striving toward. This canopy does that—mostly. The embroidery placement is excellent, the fabrics work beautifully together, and the pole attachment system is genuinely innovative. But the corners tell a different story, and that’s where the next iteration will improve.
Moving Forward
This project is complete, but the learning continues. I’ll be studying couture techniques, experimenting with alternative construction methods, and documenting what I discover along the way. If you’re a vestment maker, textile artist, or someone who works with large-scale ceremonial pieces, I hope this reflection encourages you to question your own default methods and explore new approaches.
Sometimes the best lessons come not from getting it right, but from getting it done—and then being honest about what you’d change.
Leave a Reply