POST 2: For this canopy project you’ll need fabric, interlining, and a few basic sewing supplies. Because this piece is meant to be seen from every angle — under it, around it, up close, far away — the way the fabrics sit in relation to each other is important. In my design, the “right” side of the main fabric (silk damask) is placed underneath the canopy and on the outside of the flaps, and the lining fabric (silk taffeta) sits behind the flaps and on the top of the main rectangle. This ensures that wherever people are looking — up into it, from the sides, or from the back as the procession moves — they’re seeing the beautiful face of the fabrics.
Fabrics, Interlining, Trim
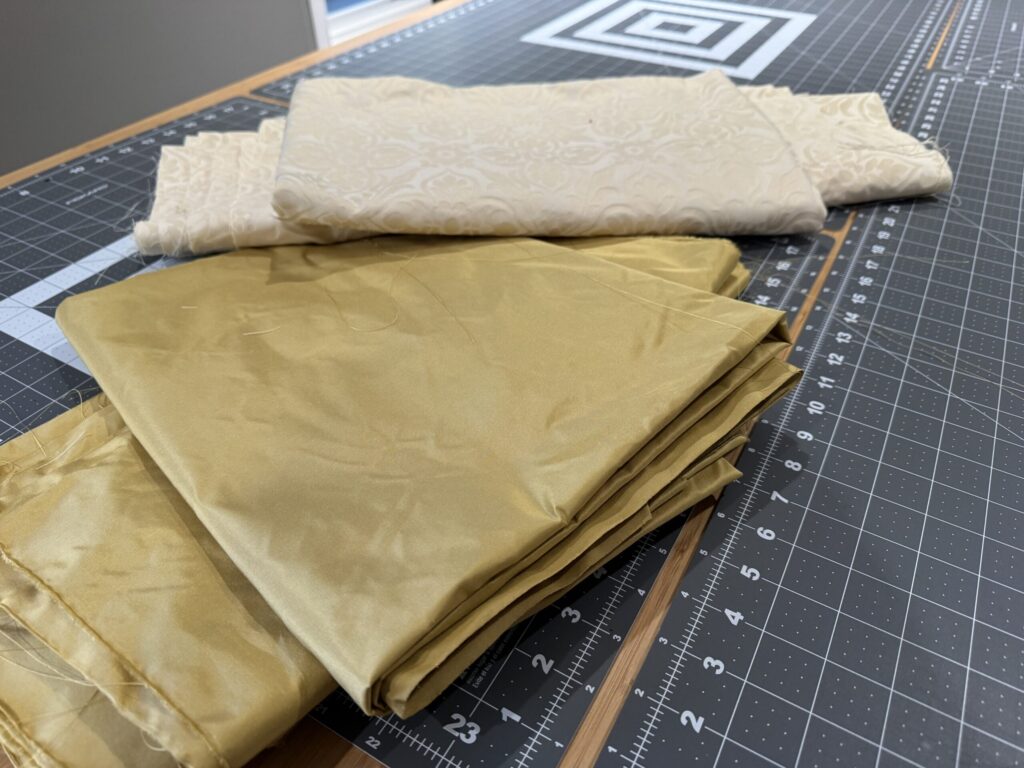
- Main fabric: 4–5 yards of 55″-wide silk damask (I used ivory chelmsford)
- Lining fabric: 4–5 yards of 55″-wide silk taffeta (gold)
- Interlining: 4–5 yards of 55″-wide 7 oz cotton duck (for body and structure)
- Fringe: ~7–8 yards (for all four sides)
- Galloon trim (optional second trim): ~7–8 yards
- 1/4″ steam a seam: ~8-16 yards (depending on how many trims you are using)
- Thread
Design note: The canopy is assembled so that the decorative right side of the main damask is always facing outward on the parts people see most: the underside of the canopy, the outside of the flaps, and the top surface of the main panel when viewed from a distance.
This combination of materials gives the canopy body and presence — the cotton duck adds a bit of stiffness so the canopy holds its shape, the silk damask and taffeta give it a rich, ceremonial look, and the trims finish the edges with a traditional flourish.
Rough Cut & Embroidery Preparation
Because this canopy relies heavily on decorative machine embroidery, the very first step isn’t final cutting — it’s preparing pieces large enough to embroider onto, then doing the embroidery before final shaping. If you cut everything precisely to pattern first, you’ll spend hours repositioning and stabilizing tiny pieces just to get your motifs centered and balanced. Instead, I start with rough cut rectangular panels that give plenty of real estate for design placement, then refine the final pattern after the embroidery is complete.
Rough Cutting the Fabric
For a canopy that’s essentially composed of a series of rectangles, I used a simple and fast approach:
- Using the 55″ width of the silk damask as a guide, I tore (cut) the following rough pieces from the main fabric:
- Six (6) full-width pieces, each 55″ × 16″ — these will become the side flaps
- One (1) full-width piece, 55″ × 78″ — this will become the main top panel
Tip: Tearing along the fabric’s cross-grain on 55″-wide silk is fast and accurate for rough layout, especially when you’ll later trim to exact embroidered design locations.
Assembling Rough Panels for Embroidery
To reduce the number of separate pieces you need to embroider and to maintain visual continuity:
- Take two of the 16″ × 55″ panels and sew them together on the short ends.
- Repeat with the next two 16″ × 55″ panels.
- Now you have:
- Two longer side panels (each ~110″ × 16″)
- Two short panels (55″ × 16″)
- One large top panel (55″ × 78″)
- Now you have:
These rough sizes give plenty of room for embroidery placement without worrying about edges or final shape yet.
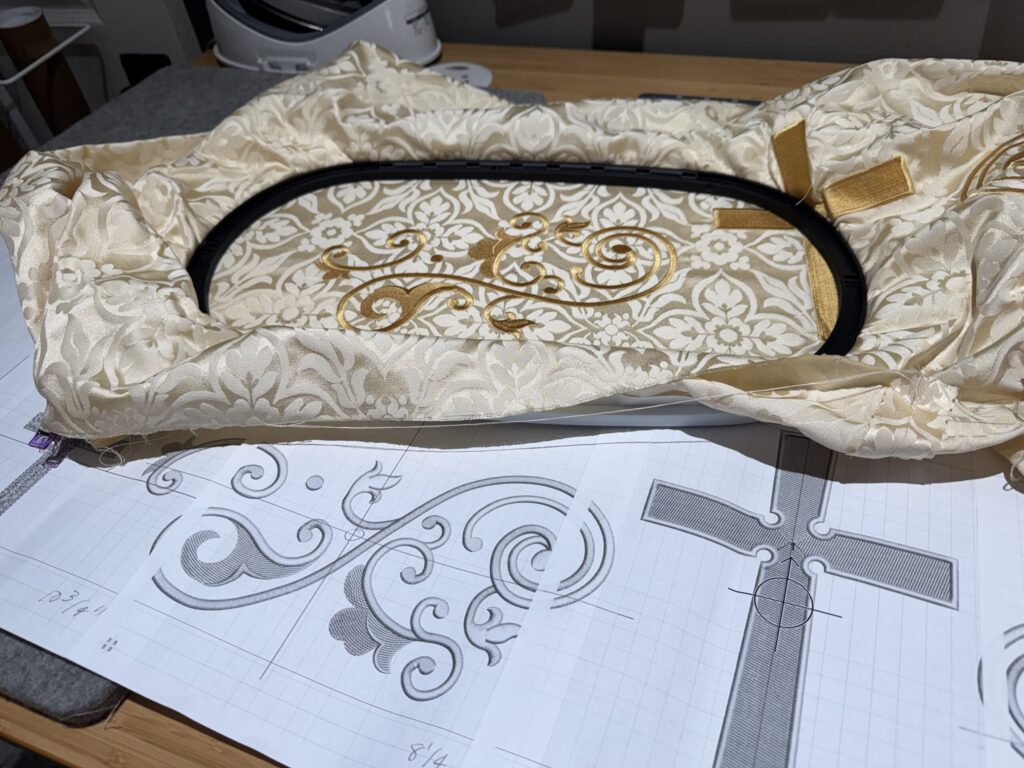
Embroidery Time
With the rough cut panels assembled:
- Spend dedicated time doing the machine embroidery on each panel,
- Centering motifs, aligning repeats, and spacing designs according to how they’ll appear in the finished canopy,
- Re-hooping and changing thread as needed.
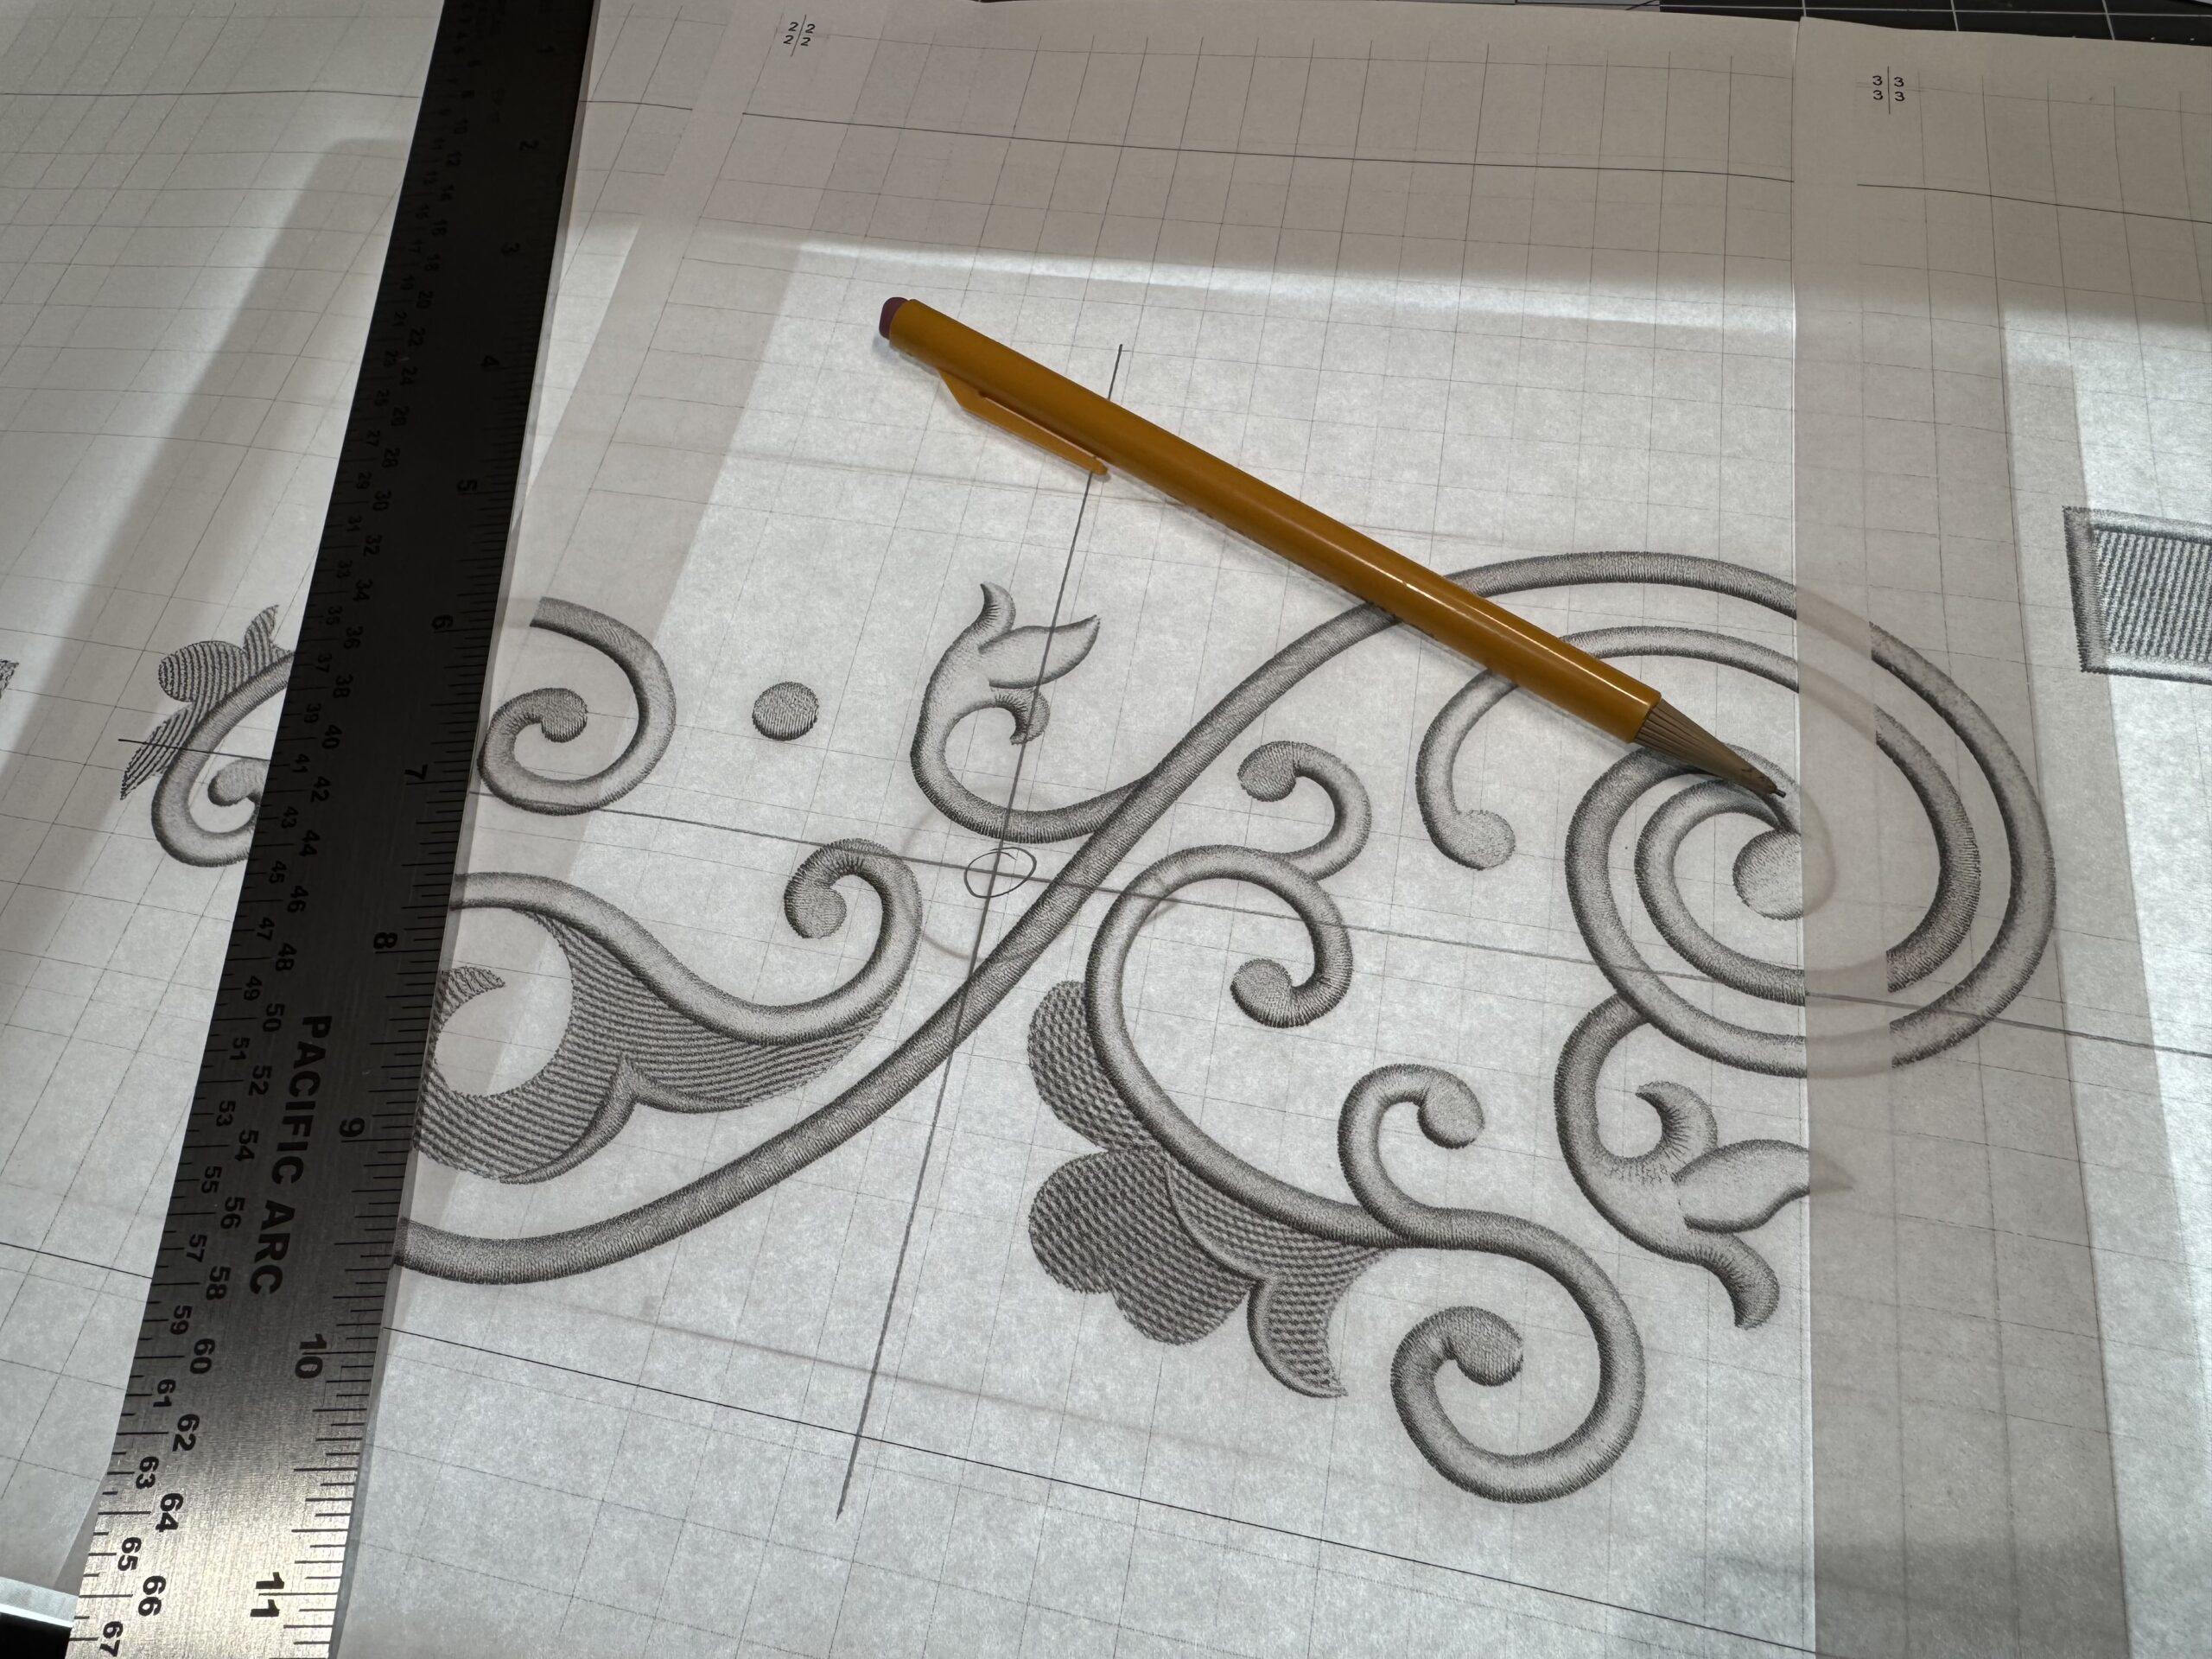
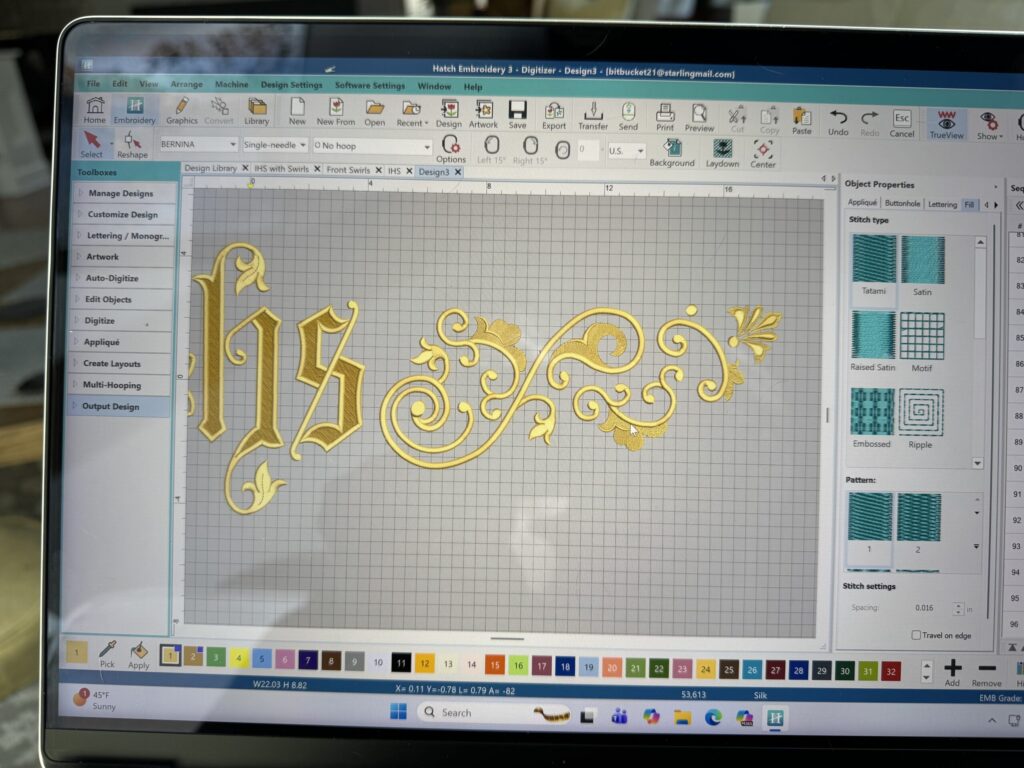
Thankfully, I already had some embroidery files digitized that I could use for this that were from some experimentation previously. So I used those to pull together a design quickly since Lent and Mardi Gras is right around the corner. The stitch out still took about five days of focused stitching — a substantial investment of time, but it ensures that the decorative work is placed correctly before any final seams or trims are applied.
Leave a Reply